Working Guide of EML to PST Wizard
Let's see how to use the software & its available features in detail. So download & install the software & be ready to use it
First, launch the program from Start » Programs » BitRecover EML to PST Converter » BitRecover EML to PST Converter
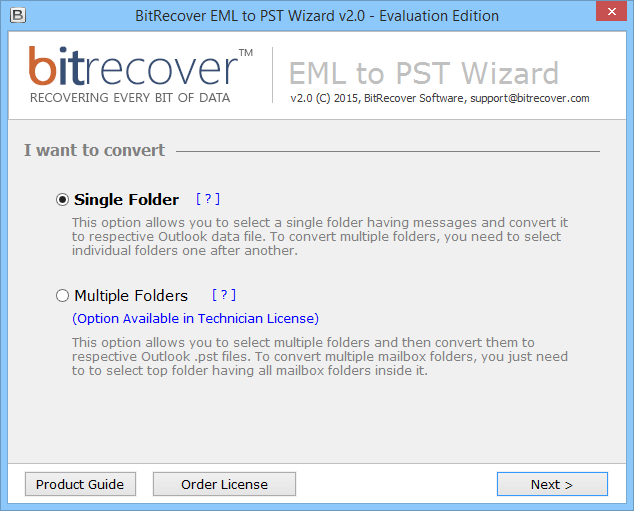
- Single Folder:- For converting a single folder, which have several EML files, this option is best. The software also creates a single PST for all the EML files.
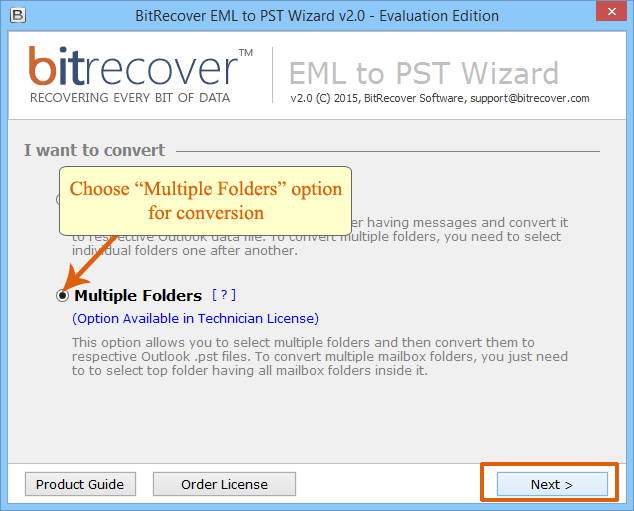
- Multiple Folders:- For converting the TOP Folder, which has multiple EML Folders, this option is best. The software creates separate PST file for separate EML folder
Note: Multiple Folder option, you will get only with Technician License


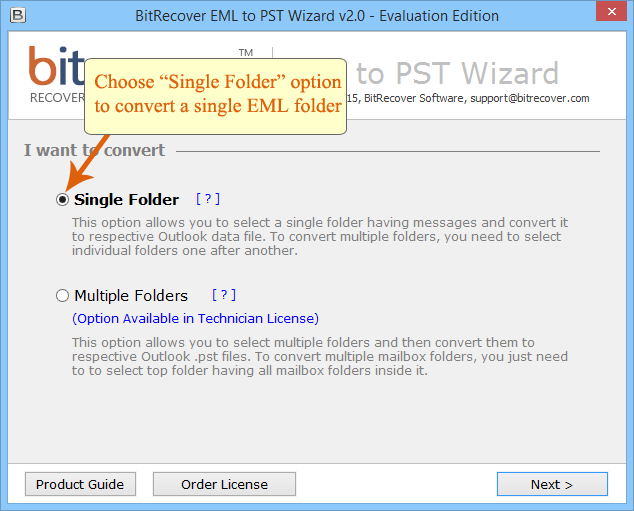
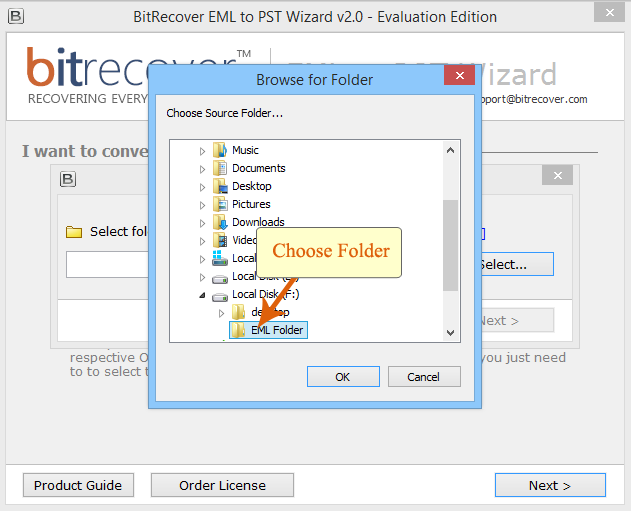
Select Single Folder option & click on "Next" button
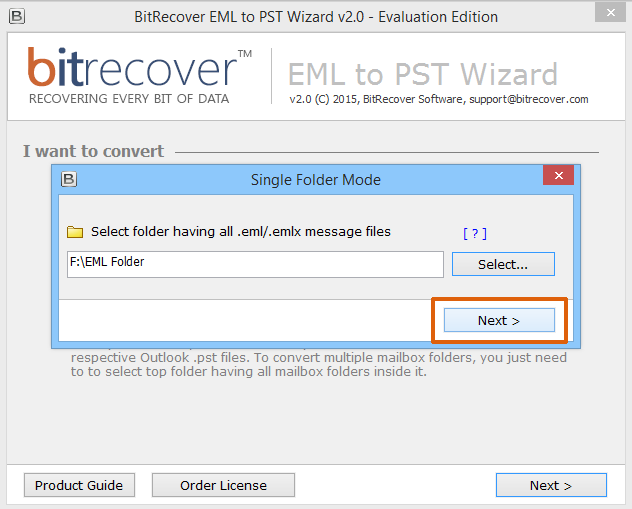
To choose EML/EMLX folder click on "Select Button"
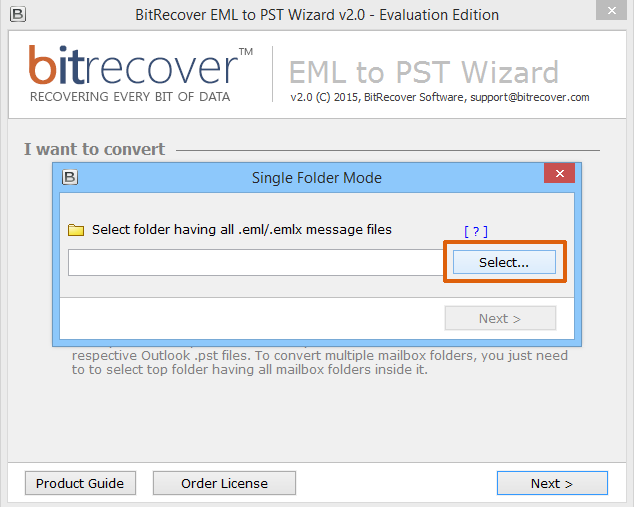
Navigate to the location where you have EML folder saved, select the folder. Read More…
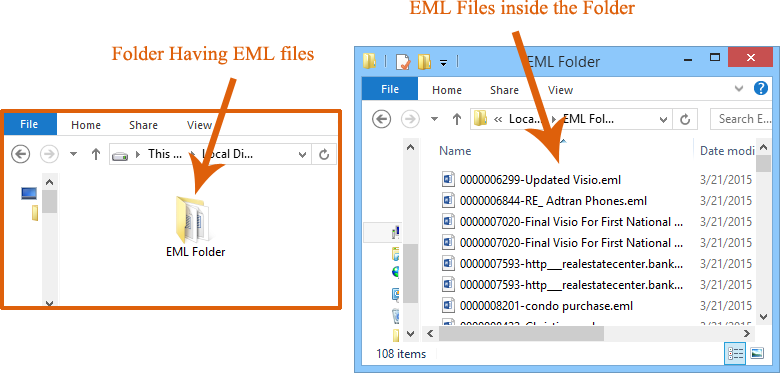
What is EML Folder?
A folder which contains several EML files that you convert & save in single PST
Click on "Next" button
Next, you will be asked to choose a location to save converted files
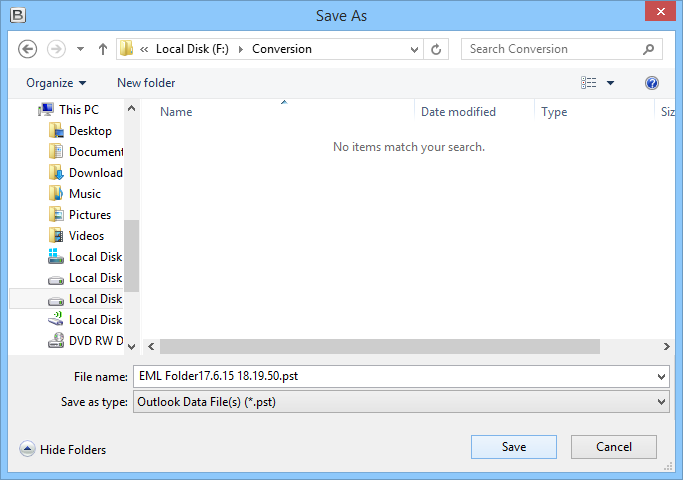
Once location is selected, conversion starts automatically
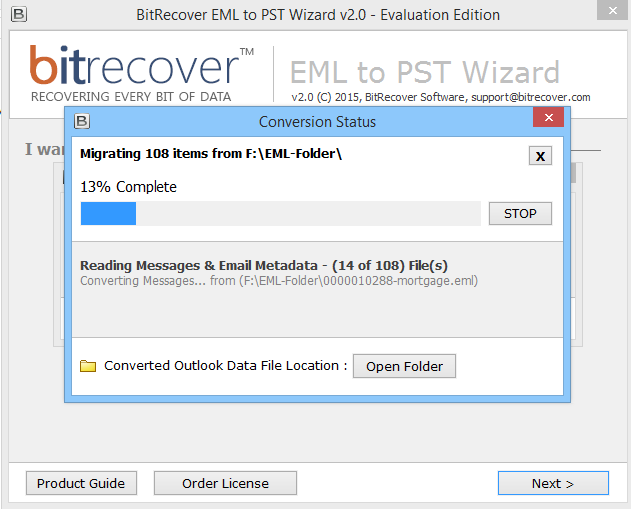
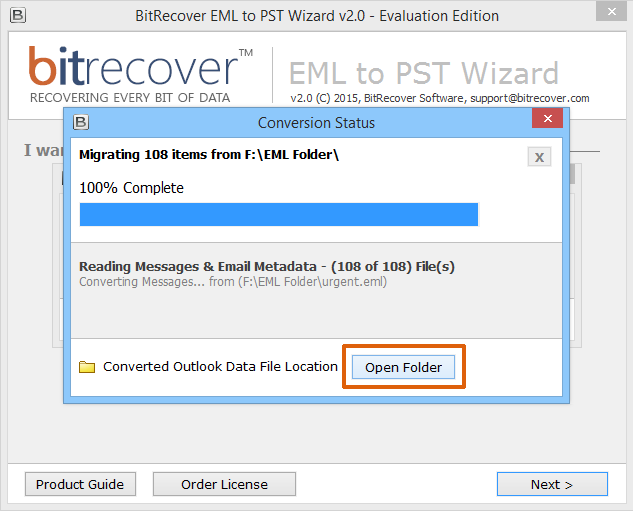
When it's complete you are alerted with a message
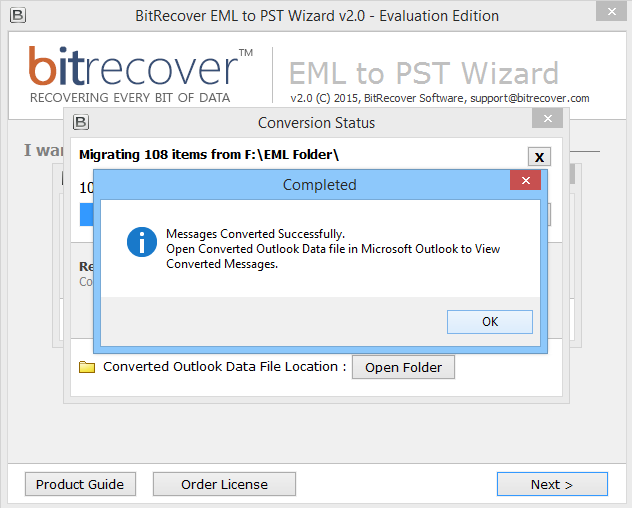
Click on Open Folder, directly go to the Output location
Select Multiple Folders option & click on "Next" button
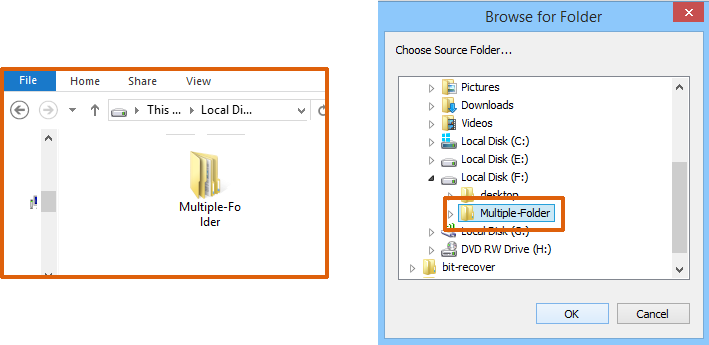
To choose Top Folder click on "Select Button"

Navigate to the location where you have the Top Folder saved, select the folder. Read More…
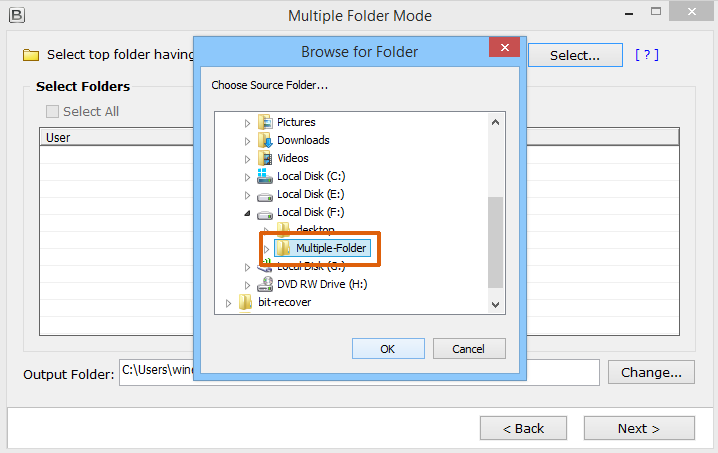
What is Top Folder?
A folder which contains several EML Folder that you convert & save in separate PST
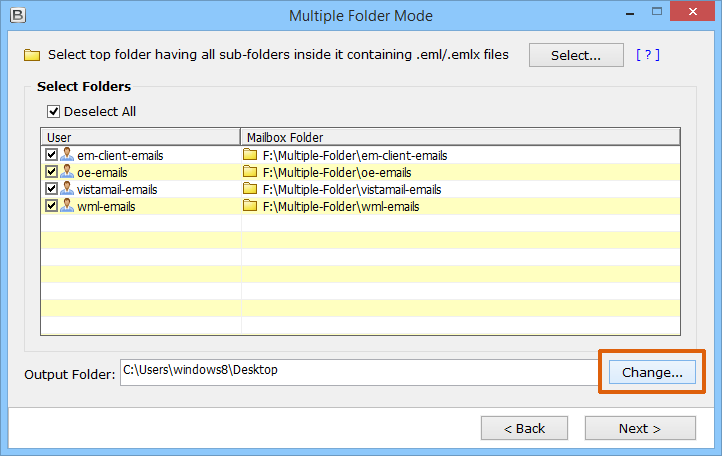
Next the software displays the selected folders list
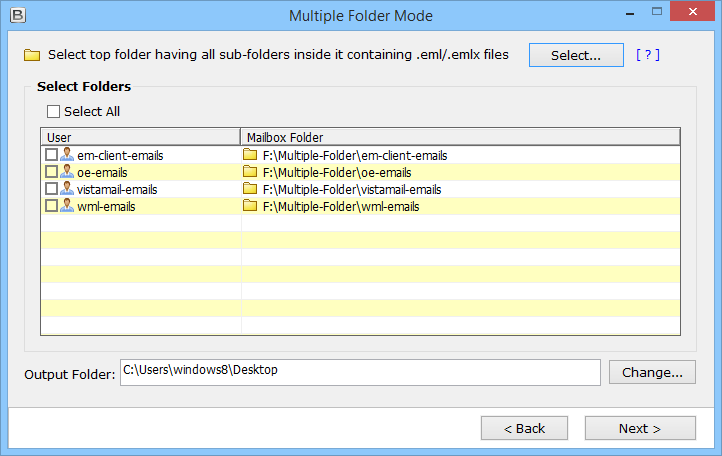
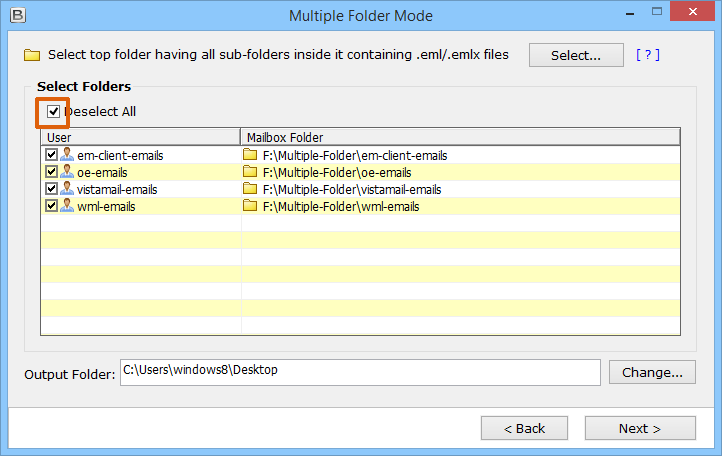
Tick on "Check All" to choose all folder for conversion, deselect the folder you do not want to convert
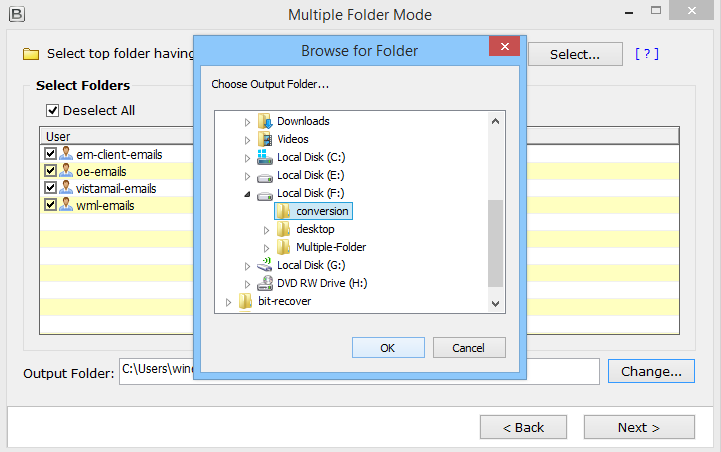
As the software choose Desktop as default "Output Location", click on "Change" button to modify
Choose new "Output Location" & Click on "Next" button
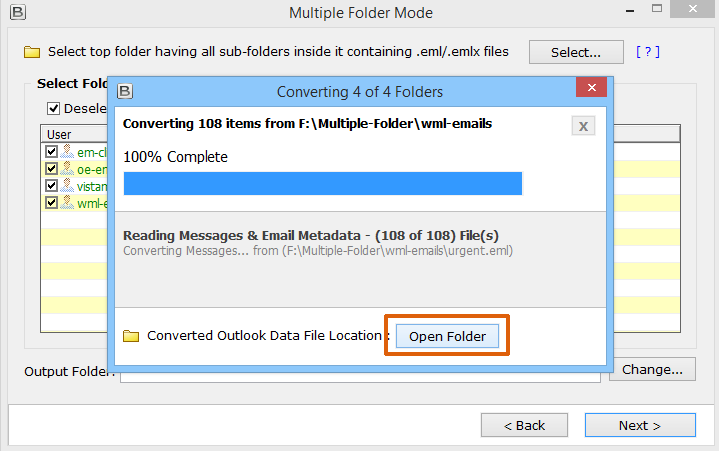
Once you click on Next, conversion starts automatically
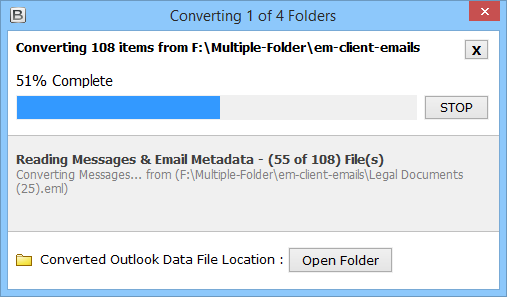
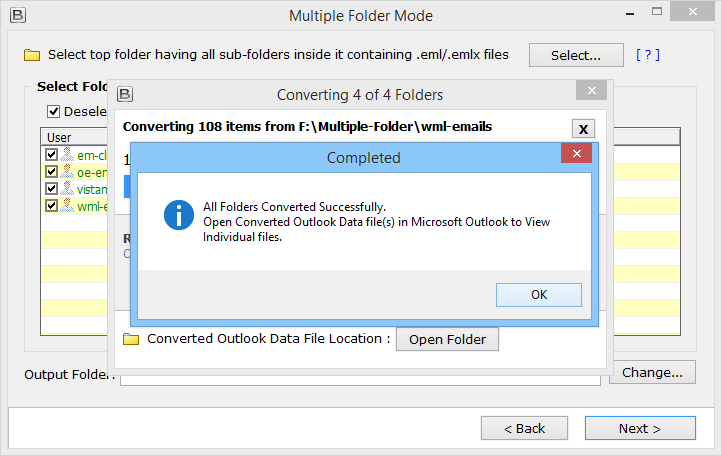
When it's complete you are alerted with a message
Once you click on Next, conversion starts automatically
Click on Open Folder, directly go to the Output location
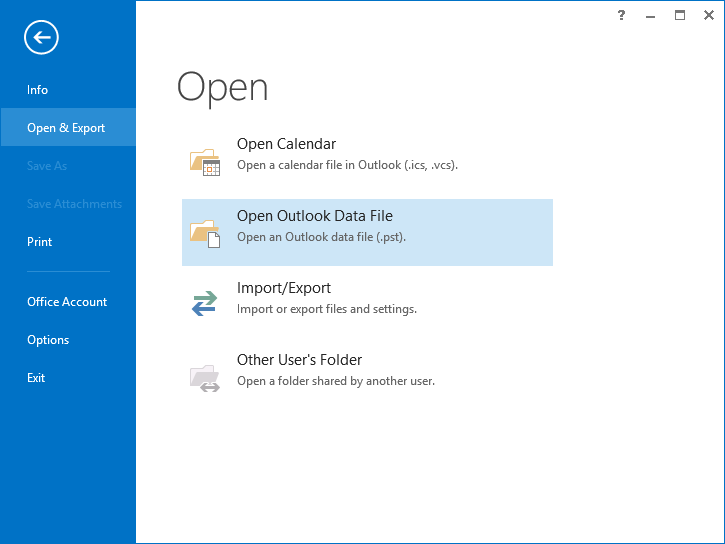
Open Microsoft Outlook, then go to File Menu » Open » Open Data file
Go to the location of PST file and select a PST
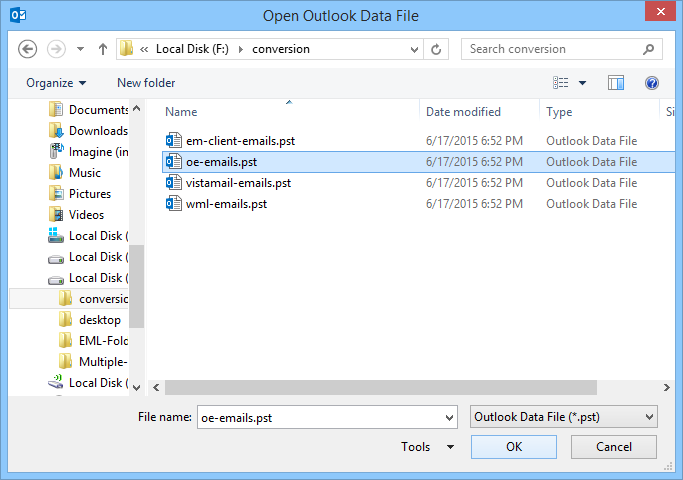
View PST file in MS Outlook (Repeat steps to open multiple PST files)